With Photoshop, a lot of things can be done to manipulate existing stock photos. You can brighten dark photos, apply color corrections, and crop out an unwanted area on the photo, but these are only basic tasks. You can also do advanced ones with it as well, including distorting images for a certain effect, cloning certain features on the image, and even removing blemishes on people’s faces.
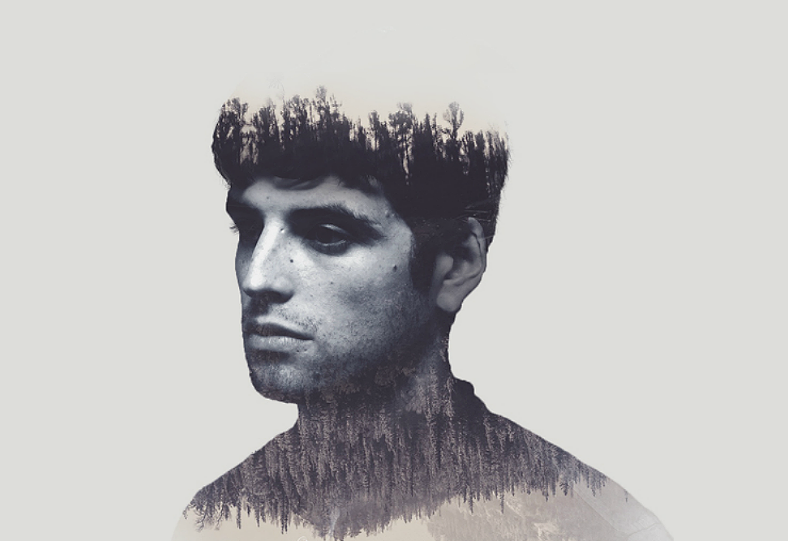
Here, we will be teaching you an even more advanced skill: creating a double exposure effect on photos. This is commonly done by photographers and graphic artists alike. You may see this effect a lot on movie poster illustrations, and other advertising media, but why not give this effect a try in the convenience of your own home? We made the steps easily understandable so you won’t have a hard time following them.
What You Need
- A photo editing software, most preferably Adobe Photoshop, to edit the image and achieving the double exposure effect.
- Two images to be used as the primary subject and its corresponding background within the image of the subject.
- Basic knowledge and skills in the use of photo editing software. If you haven’t tried using any photo editing software and are unsure which one to go with, you may check out our list of graphic designer tools for reference.
A. Preparing the Primary Image
1) Select an image to use as the main subject
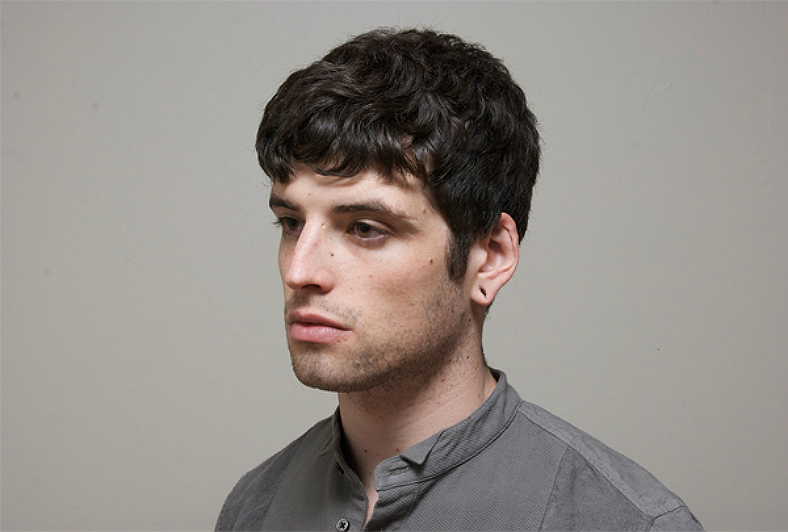
The first and foremost step when doing any photo manipulation is to choose a photo to edit. For this one, you will be using two images to serve as the two different layers to achieve the desired effect. The primary image has to be the main subject, which means that you need to select a portrait image of a person, or at least a close up image of an animal or anything that you intend on using. As much as possible, use an image with a simple, solid-colored background for easier editing. You will understand why in the following steps.
2) Slightly increase the brightness of the image
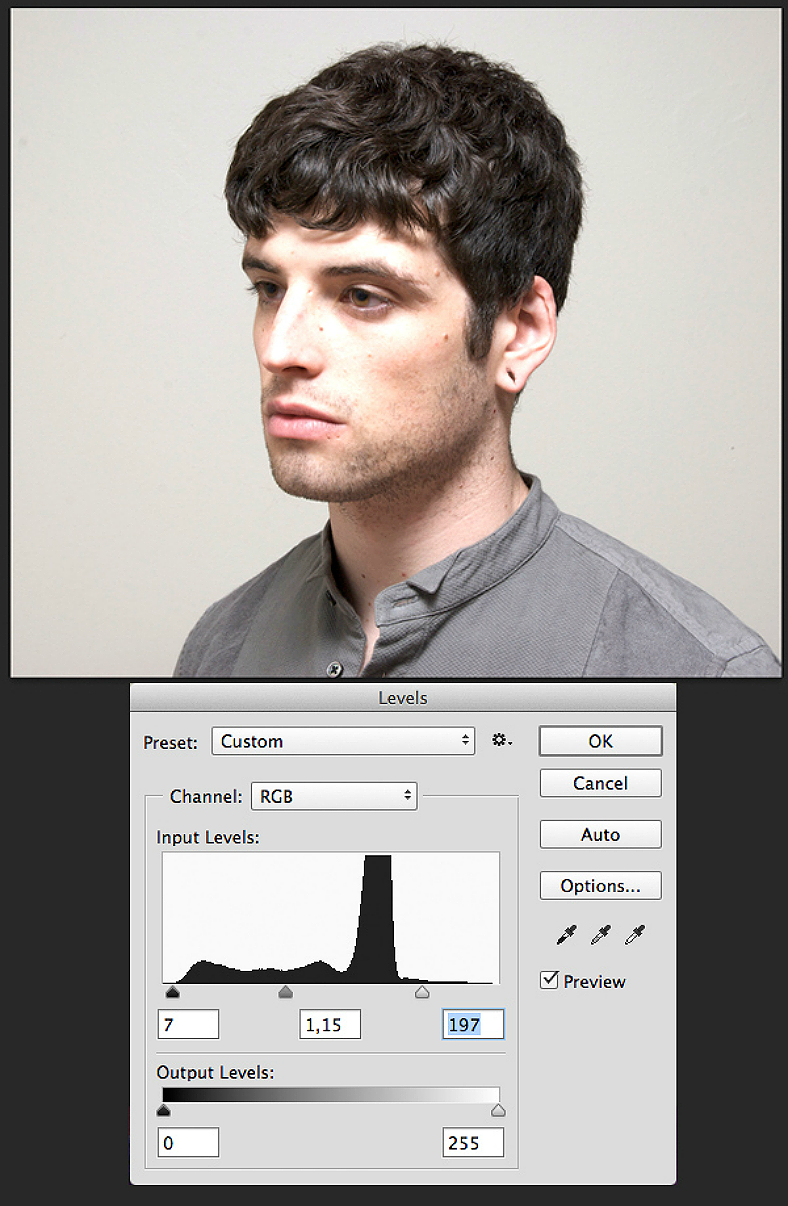
The next step of the process is often disregarded since the effect can still be achieved even without doing this. The reason behind brightening up the image slightly is to make the edges of the subject more defined and clear. This makes the image easily distinguished from its background. So, if an image is dark, you obviously would need to slide the brightness level up to make the image clearer. But if an image is already bright enough, you will still need to add a little bit of brightness just for the sake of making the cropping stage easier, as well as to make the features on the image more suitable to achieve the double exposure effect.
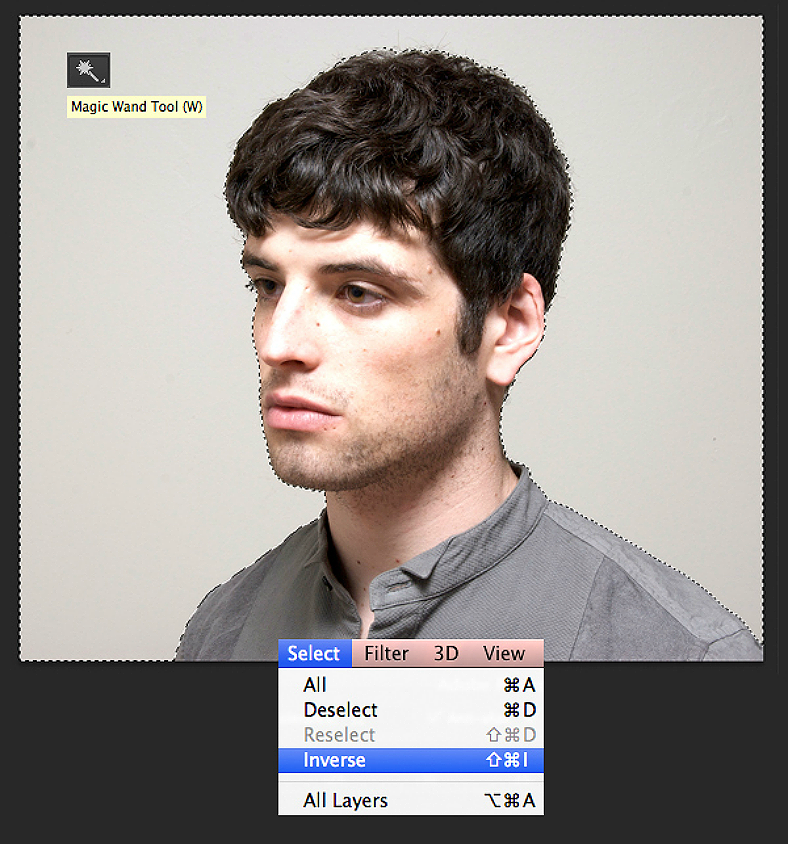
3) Crop out the subject from the background
Using the magic wand cropping tool on Photoshop, carefully trace the edges on the subject. At this stage, you don’t need to stress yourself into perfecting the crop, you may do that on the next part of the process. What’s important here is that you will be able to separate the subject that you wish to use from its background. Once you have completely traced the subject, click the right mouse button while placing the cursor within the selected area and choose Inverse to deselect the subject and select the surrounding area instead. After doing this, simple erase the selection by clicking on the Delete key.
4) Enhance the cropped subject
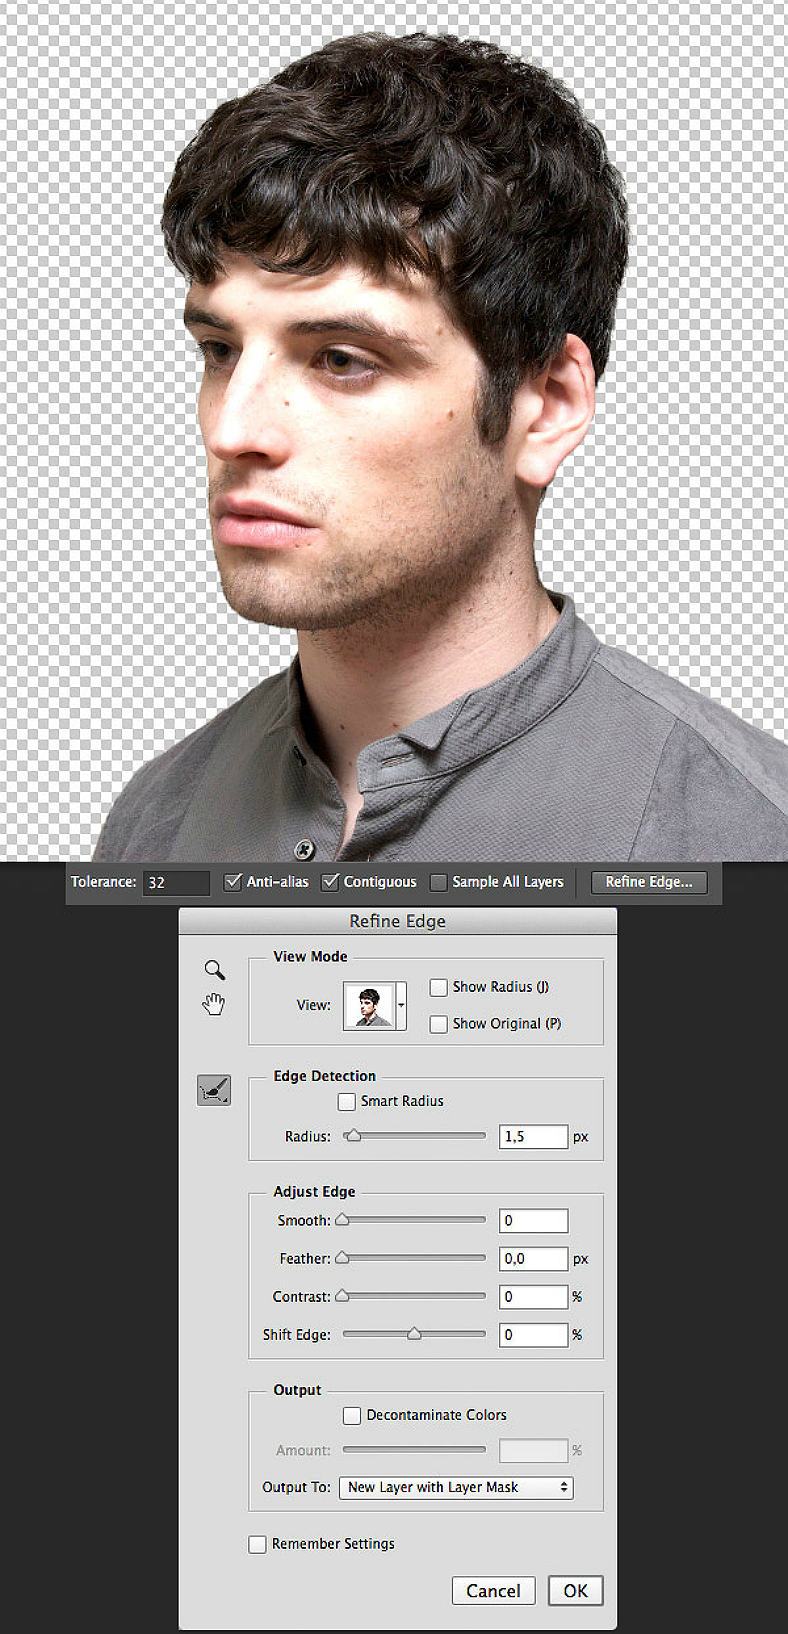
Let’s say you have already cropped the subject from its background. Now, you have to make fine adjustments to make the cropped image look better once the double exposure effect is applied. Do this part carefully and meticulously to avoid cropping out some useful features and also to avoid leaving traces of the original background behind. If you are unsure which settings can achieve a better crop result when dealing with minor issues, then do some trials-and-errors with the Refine Edge tool.
5) Add a solid-colored background behind the cropped subject
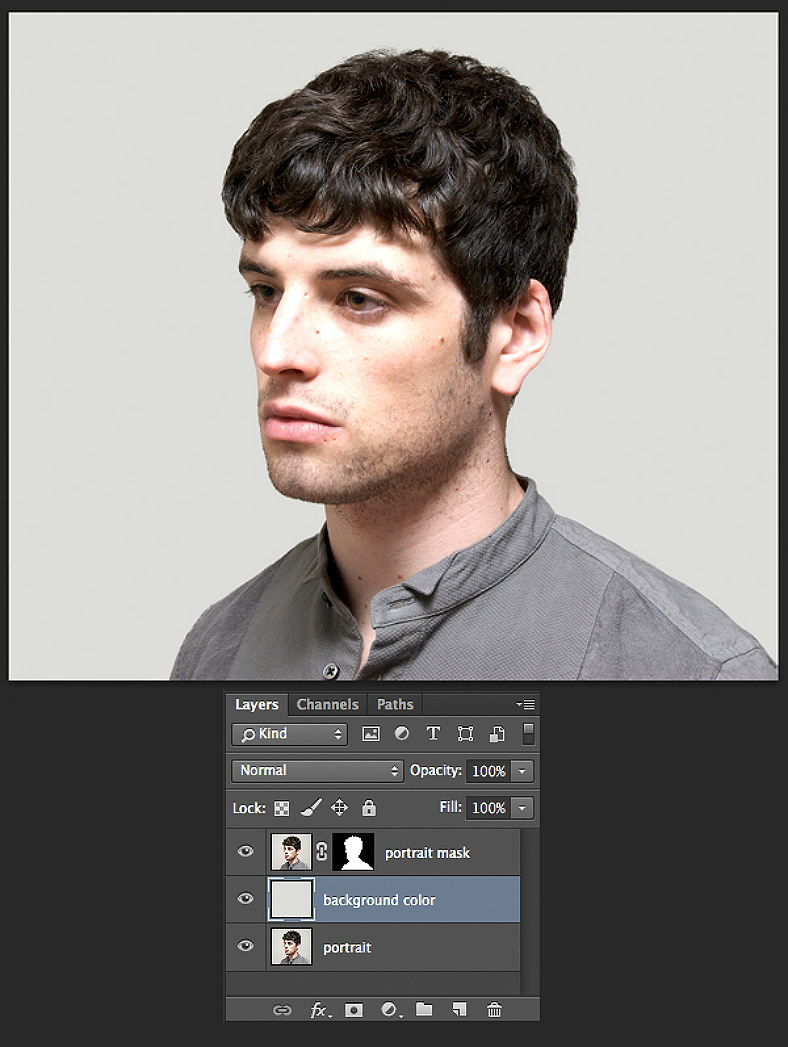
After completely and perfectly cropping the subject, add a background of solid color different from the one that you just removed from the image. Choose a color that compliments the result once you apply the double exposure effect to the image. It is best that you already have an idea on how you want your end-result to appear to know what color you can use for the background layer. For this demonstration, the intended finished product should have a foggy, gloomy appearance, so the appropriate background color for this should be gray.
After doing all the necessary steps on the primary image or the main subject, and has just been isolated from its original background, the next set of steps will now focus on the secondary image. This image will serve as another layer which will then be incorporated to the main subject to be able to achieve the desired double exposure effect.
B. Adding the Secondary Image
1) Select a secondary image to use as the internal background
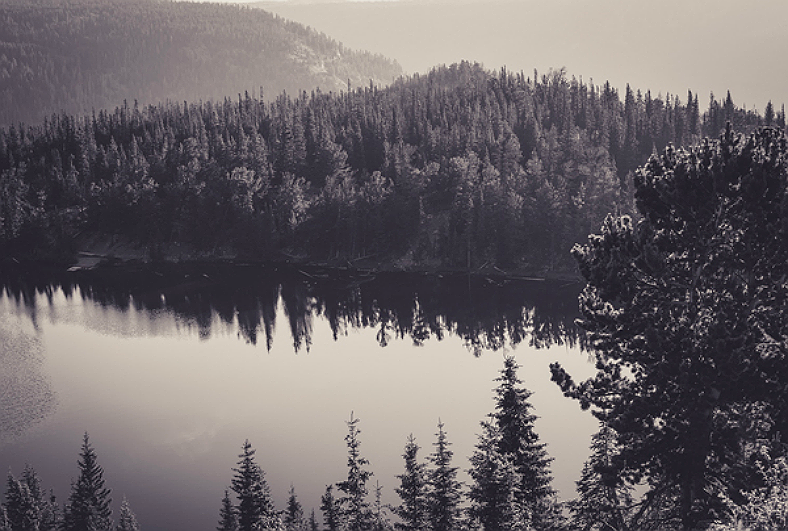
Now that you have successfully cropped the subject and added a new background to it, the next thing you will need to do is to find a secondary image that you can incorporate to the primary image. The best choice of images to use for this purpose are scenery photos or landscape imagery photographs. For this one, we will be using a scenery image which shows a river and a forest full of pine tress, and the color scheme used on this image is grayscale. If you wish to change the scheme on this image, you can use Adobe Lightroom as well, and you can refer to our list of the best free Lightroom presets you should consider trying.
2) Make a tracing on the secondary image
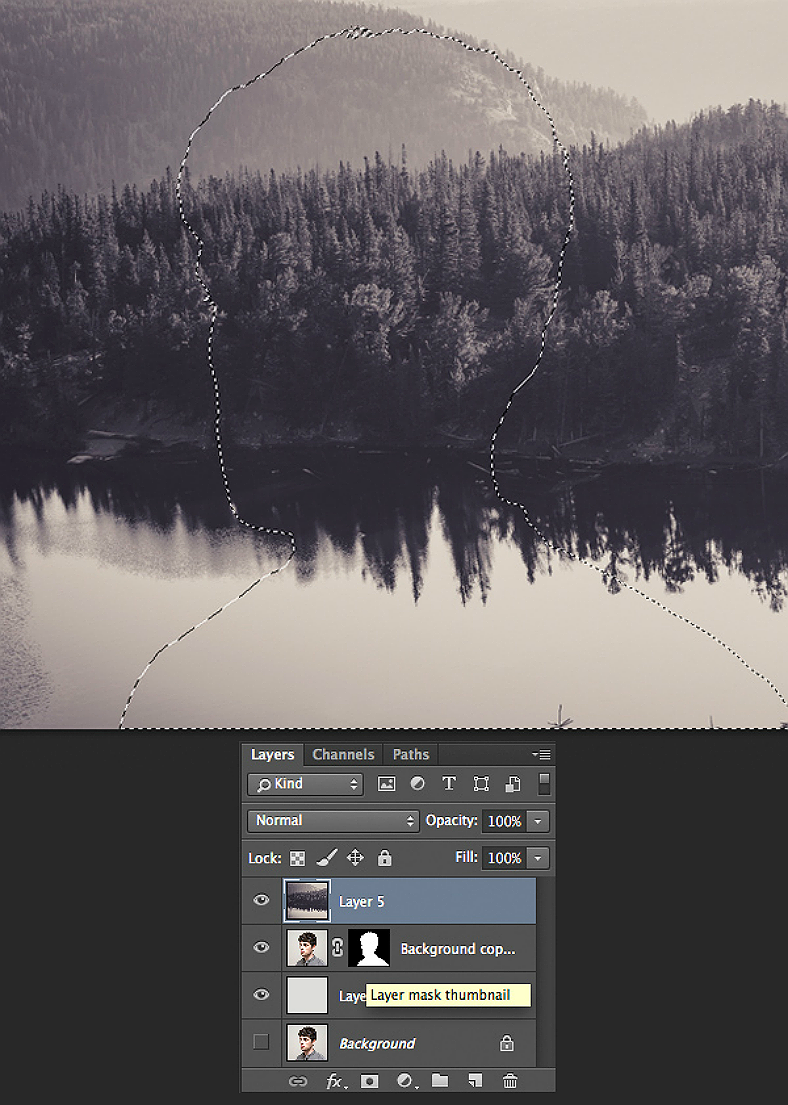
You don’t really have to MAKE a tracing for this one, you just simply need to use the crop selection from the primary image and apply it here. What you want to achieve is to make a selection on the secondary image to isolate a given shape. You can use this as an overlay to the primary image and make it appear as in internal background. A rule of thumb—carefully choose which part of the image you want to isolate. You wouldn’t want to crop the area that only shows the river. Instead, experiment with the different areas on the secondary image and choose only the best one. For the example shown above, should be the river and the trees.
3) Convert either the primary layer or the secondary layer to grayscale or black-and-white
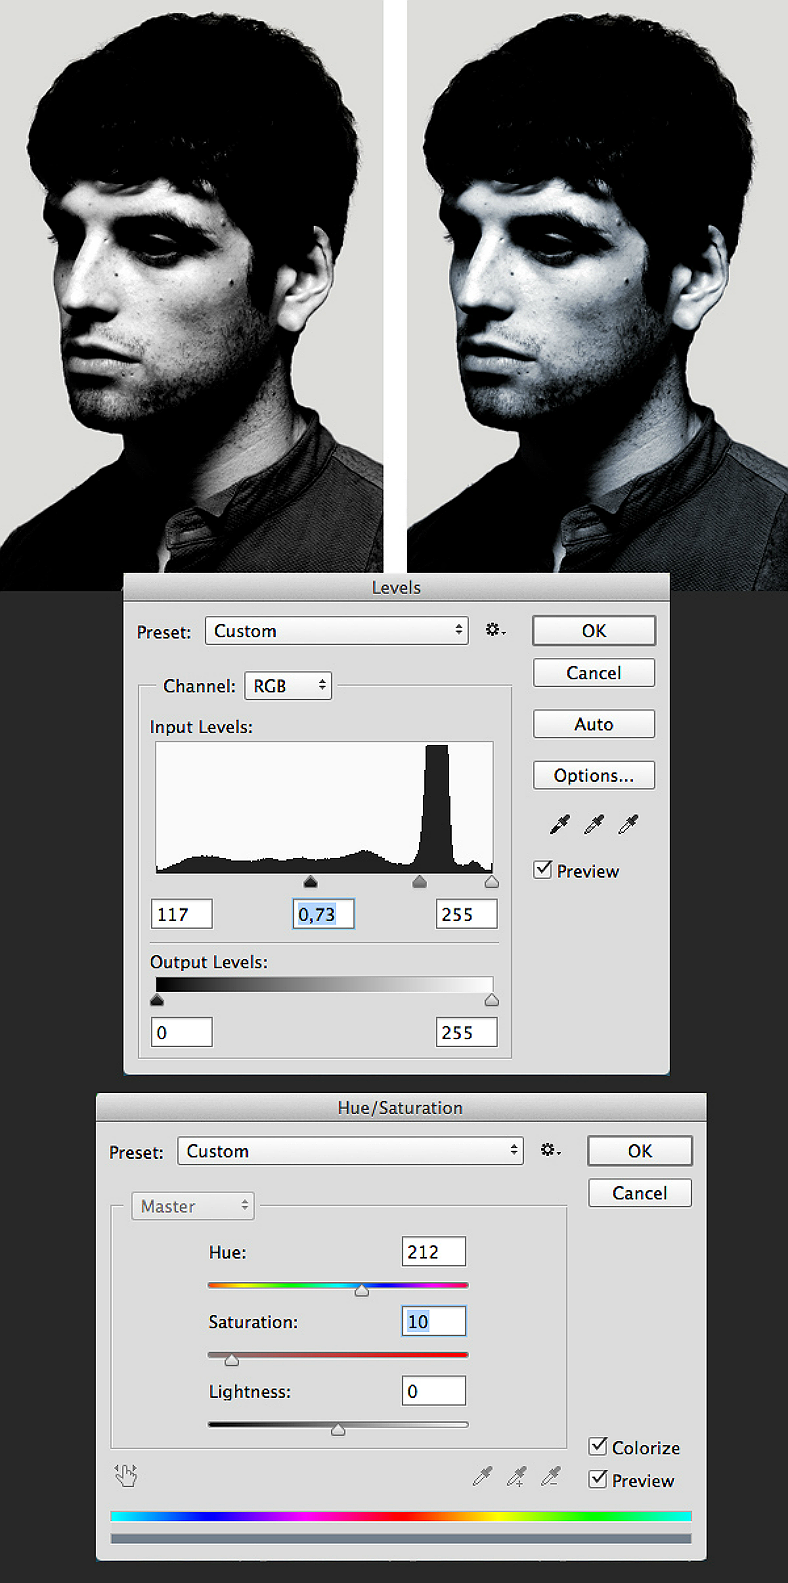
This step of the process will solely depend on your preference, and you can choose to convert either the primary or the secondary image to black and white, with one resulting in a different outcome than the other. For this sample, the one being converted is the primary image, which has been made darker by altering the image’s Levels and decreasing the saturation using the Hue/Saturation adjustment tool. The end result will be the same as the one shown above, and the main subject is easily distinguishable from its background.
4) Combine the two layers
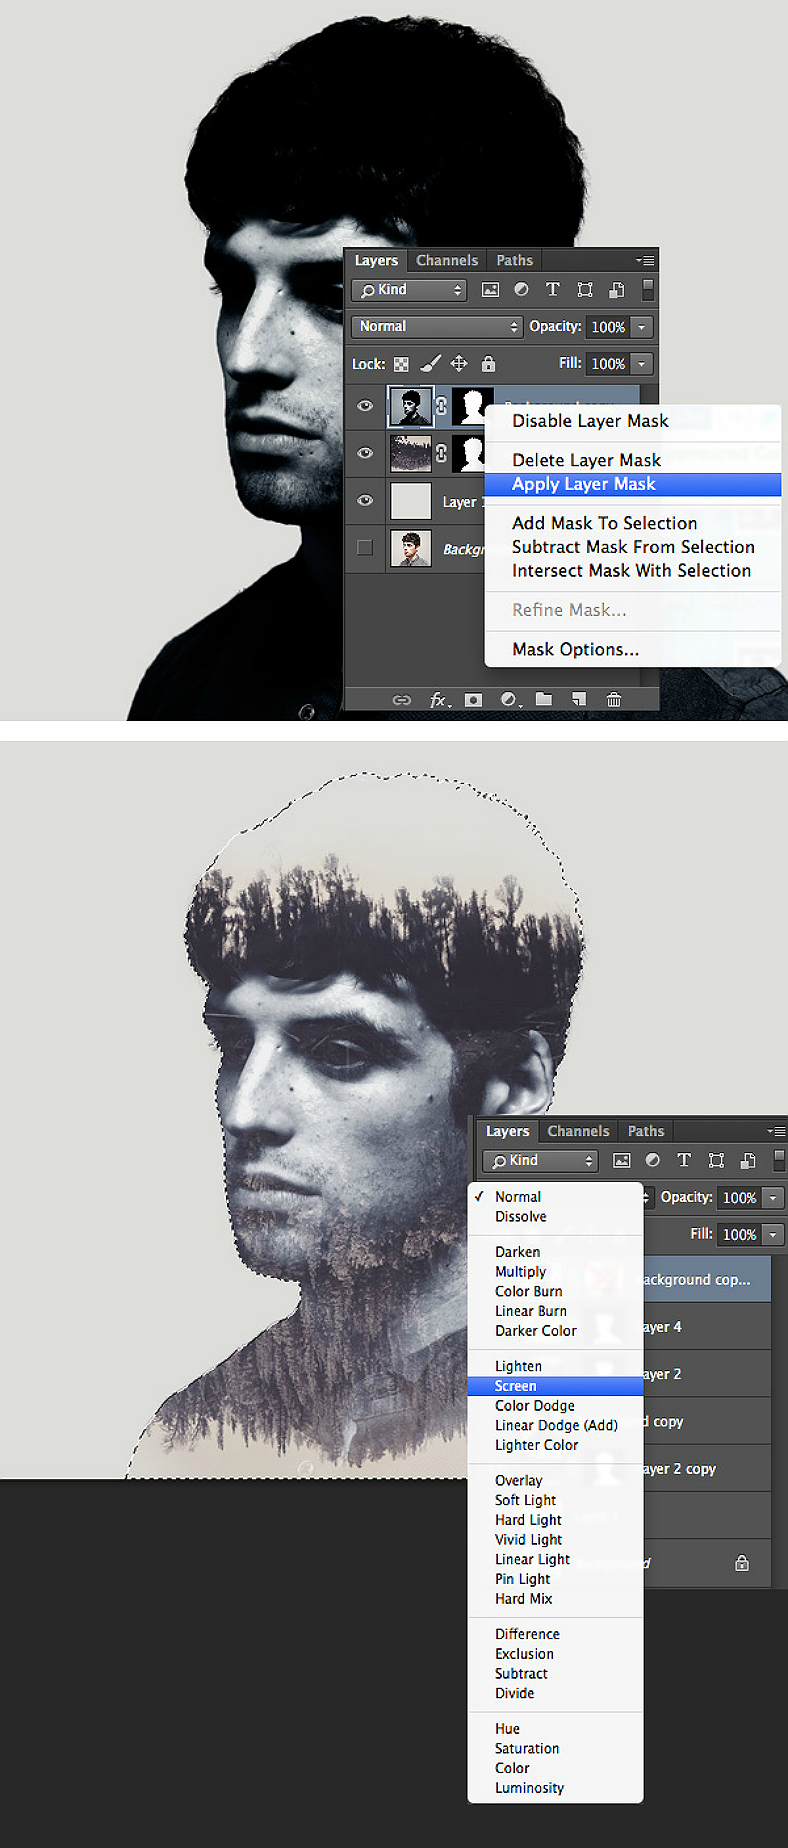
Now that you have already made two distinct cut outs of both the primary and secondary images, it is now time to combine both layers by right clicking on the primary layer and choosing Apply Layer Mask. As for the blending options, you can play around with it and try each option to see the different possible effects. From there, you can choose the blending style you find is best for your double exposed image.
5) Finalize the image by blurring or fading out some of the edges
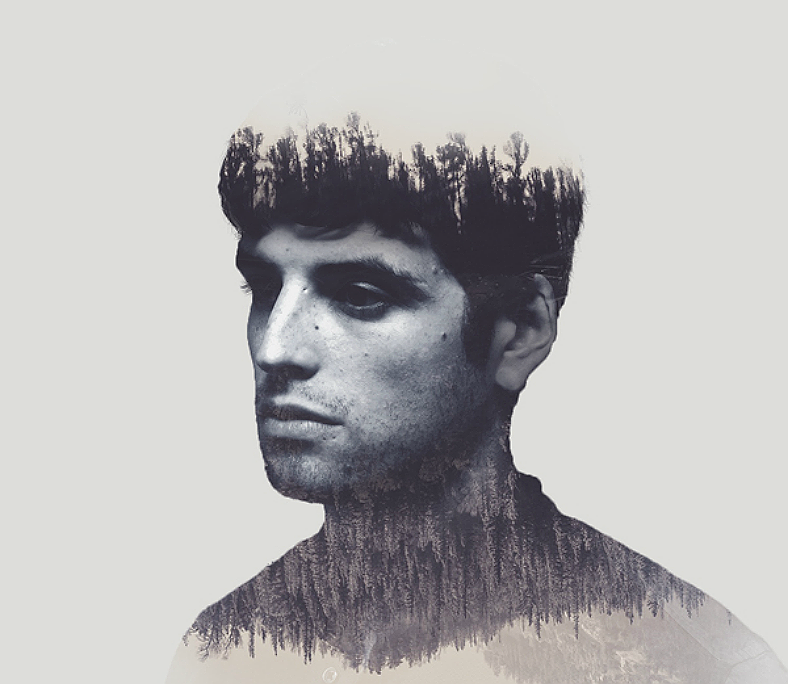
Lastly, make final touches to the image by slightly blurring the edges for a smoother look. You can also fade out some parts, especially those with very minimal details, in this case, the part where the sky is visible. You can remove these parts by blending it with the common background. The result will give the subject uneven edges in some areas, which is an effect that you want to achieve. If you want, you can add some creative text on the image, and we recommend you check out our list of Photoshop text effects for this.
Voila! By now, you probably have ended up with something that is just as close as the last image above, or if not, just practice consistently until you finally get the hang of it. We sincerely hope our step-by-step instructions were as easy to understand as teaching people how to cook spaghetti. But like we said earlier, with practice and determination, you will eventually find this quite easy and in no time, you will be able to create professional-grade double exposure effects on your images.
After this, you might want to know how to design your own logo that you can use for your business, and you can learn this simple process by checking out our tutorial on how to create a logo.
Related Posts
The Best New Portfolio sites, March 2023
Best Poster Designs 2023: Ideas and Tips
Hit and Miss of Olympic Logo Designs from 1924 till 2023
10 Iconic Moments Photographed in 2023 Rio Olympics
Top 5 Logo Design Trends of 2023
2023 Packaging Design Pentaward Winners
Digital Design Trends for 2023
Best Travel Apps for 2023
9 Script Fonts for 2023
10 Best Free Fonts for 2023
10 Best Mobile Games of 2023
Logo Design Strategies for 2023
Top 9 Web Design Trends for 2023
10 Most Popular Graphic Design Trends of 2023
Visual Design Trends to Look Out in 2023
